

Since recently discovering the benefits of baking my sourdough inside a Dutch oven / casserole dish, I’ve been looking into more ways to improve my loaf. Now I’m writing all the changes down in this blog post to remind myself what the changes are!
~70% hydration
I’d already decided to add a bit more liquid to my dough, bringing it up from 60% to 68% hydration, by adding the same amount of water as I do starter. This isn’t that high, but I’d been making it rather dry to ensure it wasn’t too sticky when proofing it. However I’ve discovered that as long as you flour the dough properly (not just the banneton) before proofing it’s not a problem.
Autolyse for 20 minutes before kneading
I’ve had good results from my stretching and folding, so I’m going to take another couple of leaves from the no-knead method, but still with some kneading (it’s easy with a stand mixer!).
The no-knead method incorporates the flour & water and stands it for 20 minutes to autolyse before the salt and starter is added. So I’ll do the same, but still knead for five minutes once the salt is added.
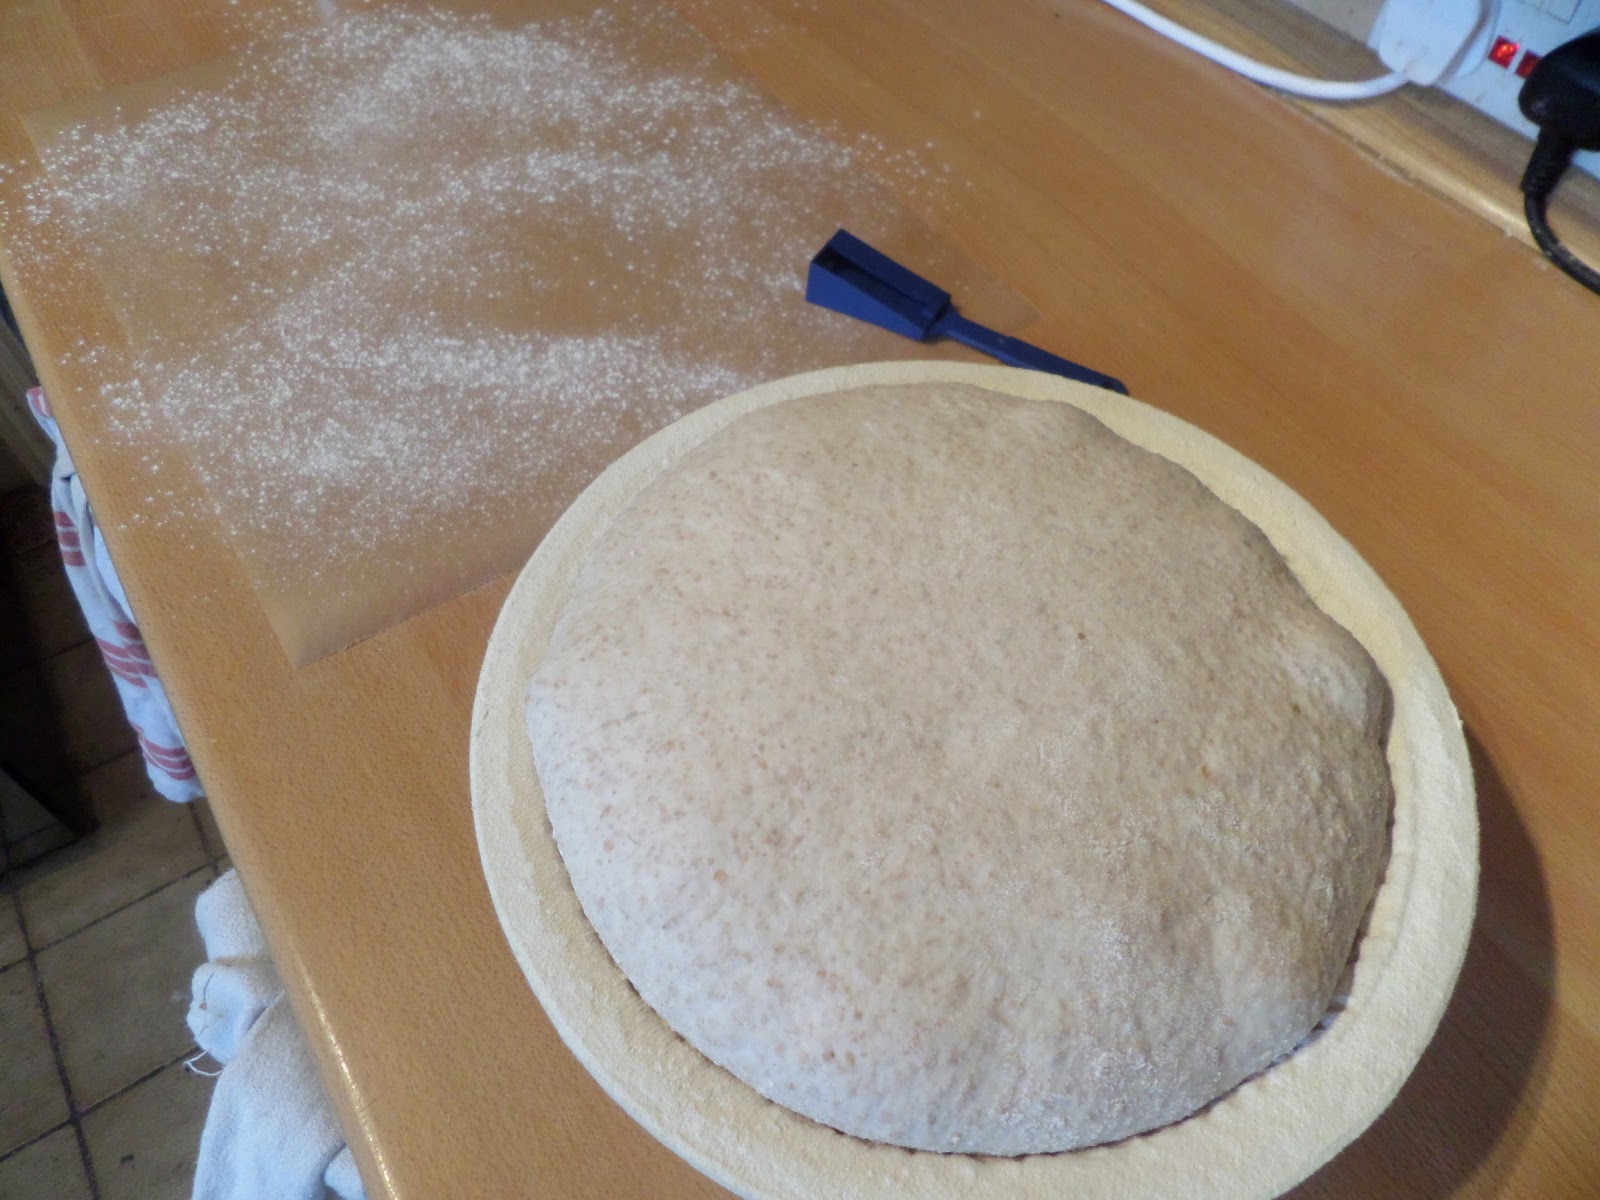
Fridge proof in banneton, covered with tea towel, inside a plastic bag
I’ll be proofing overnight again, but instead of using a plastic bowl in the fridge, I’m going to fridge proof in a banneton covered with a tea towel, and placed inside aplastic bag. I was considering just using a plastic bag, but I’m worried about it sticking to the dough if it gets wet from condensation, hence the tea towel.
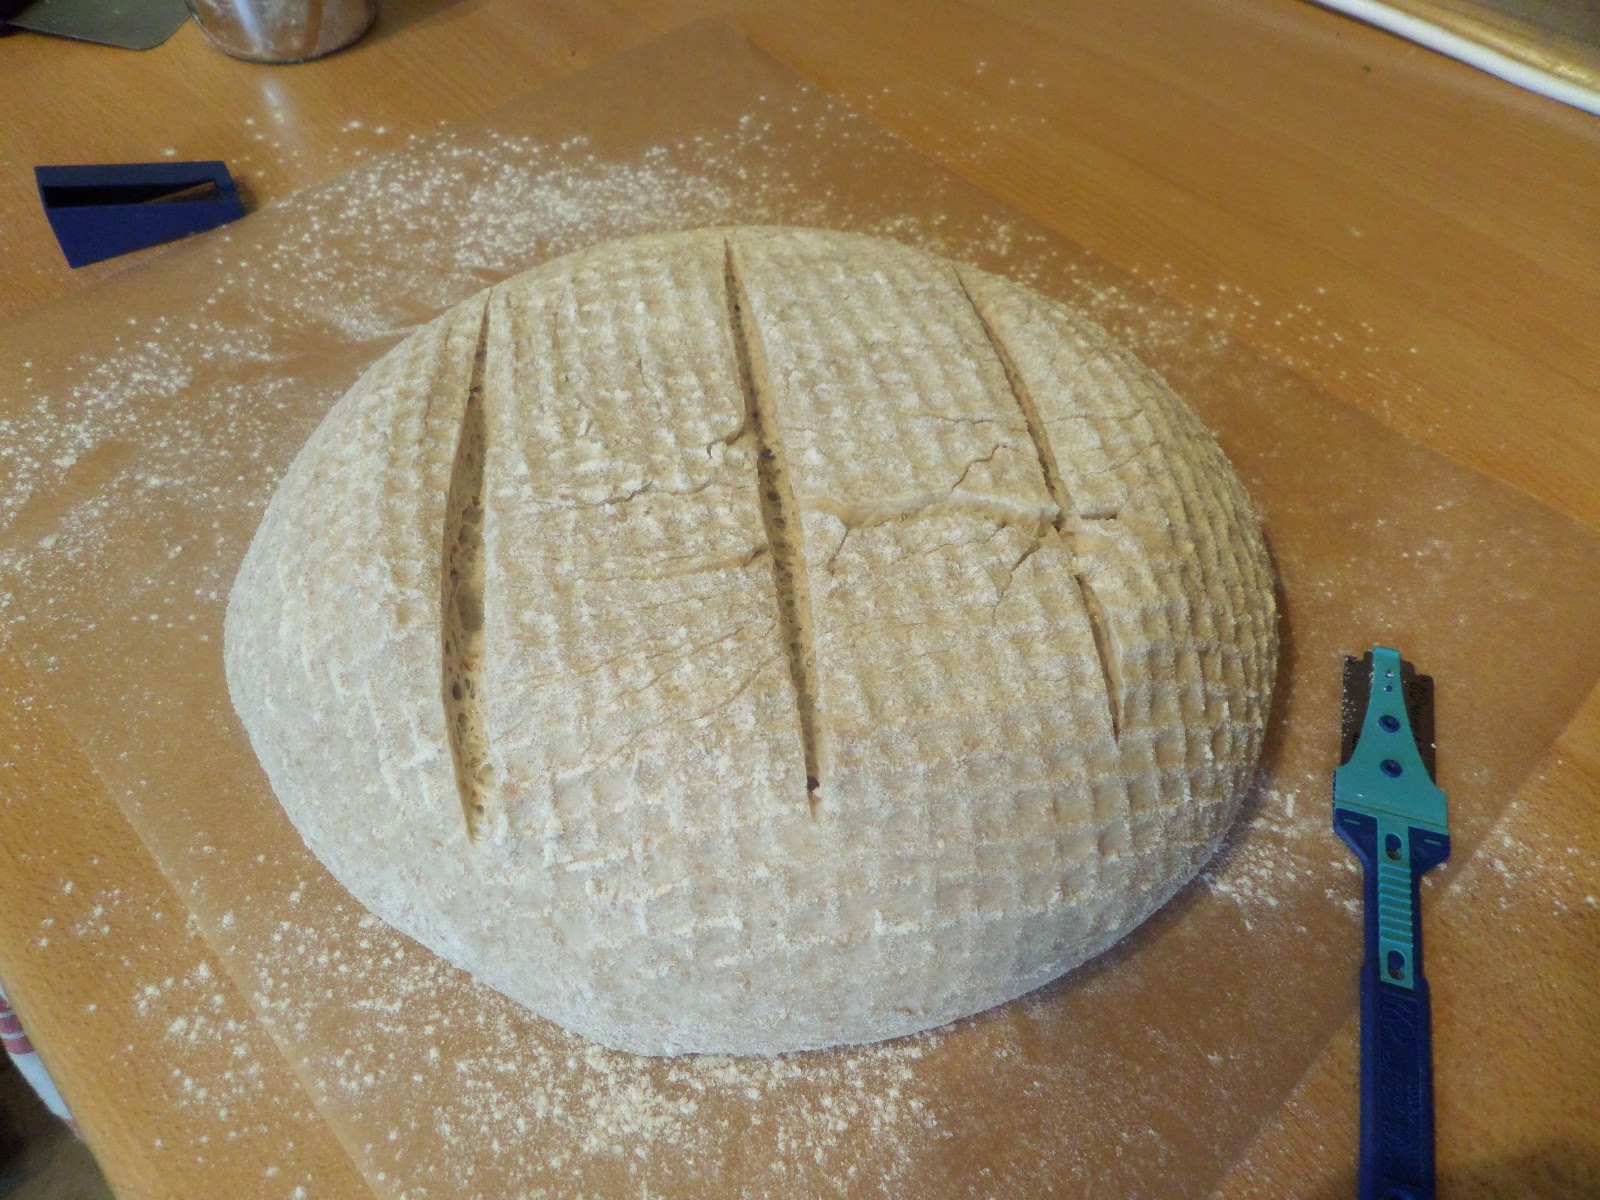
Score with lame, transfer with parchment sling
I’ve had issues with scoring my loaves: neither a sharp knife or serrated one is very easy. So I’ve bought myself a lame (aka a handle for a razor blade) to do the scoring. Also it probably doesn’t help that I’ve been trying fancy designs like a Triforce… so this time I’m going to keep things simple and just make three individual slashes.
Then to avoid potential burning while transferring to the hot casserole dish, and to try and keep the shape better, I’m going to transfer to on a baking parchment sling. This will stay in while cooking, and hopefully make removing the loaf easier once it’s baked.
Results
Autolysing made a noticeable difference to kneading the dough. Normally I knead for much longer than my stated five minutes to get the dough to stop being sticky, and that was with less liquid. With the autolyse it really did take five minutes in the mixer and it was nice and stretchy without being sticky: a good sign methinks!
Scoring with the lame way amazing – so easy compare to knives! A well spent tenner there :)
Transferring to the casserole… better with parchment, but still a pain, and it still closed up the scores: I think a better plan might be to score one it’s in, then spray it and put the lid on.
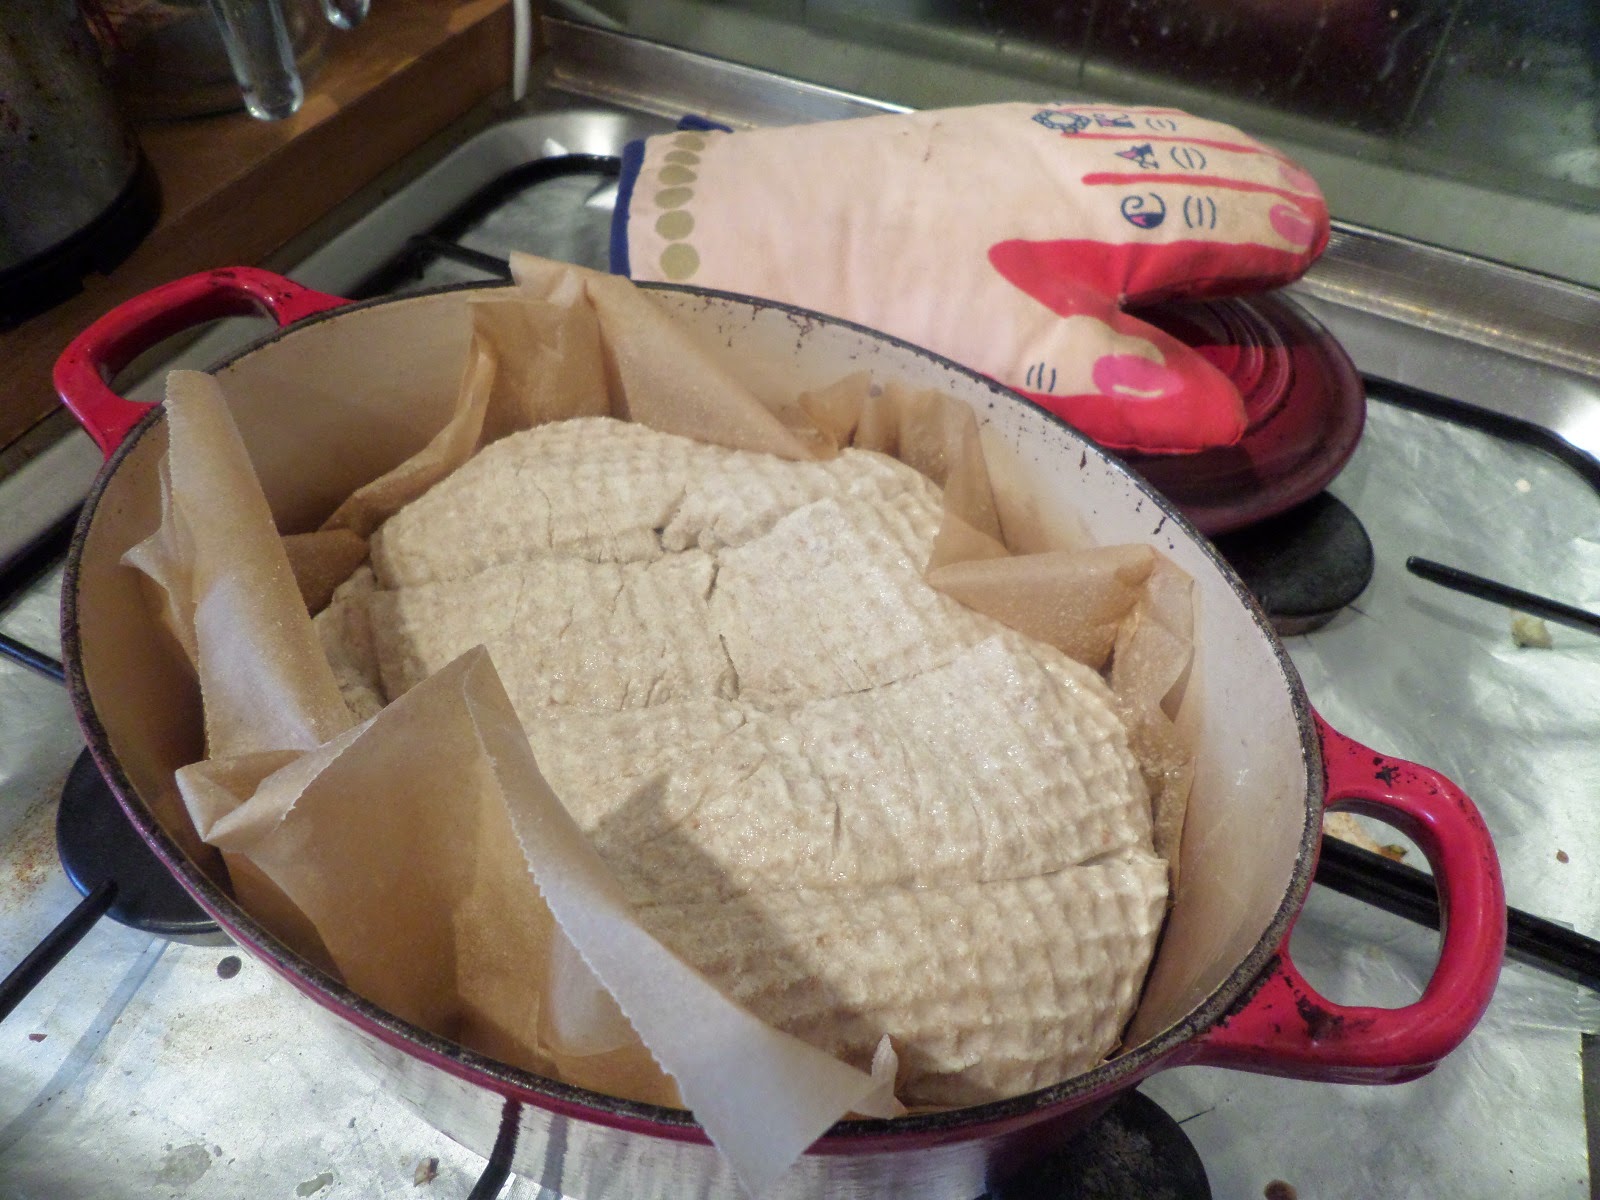
After baking for 25 mins lid on 15 mins lid off it looks pretty good, and the temp is good. But it’s developed an extra crack that I didn’t score, probably due to the parchment transfer.
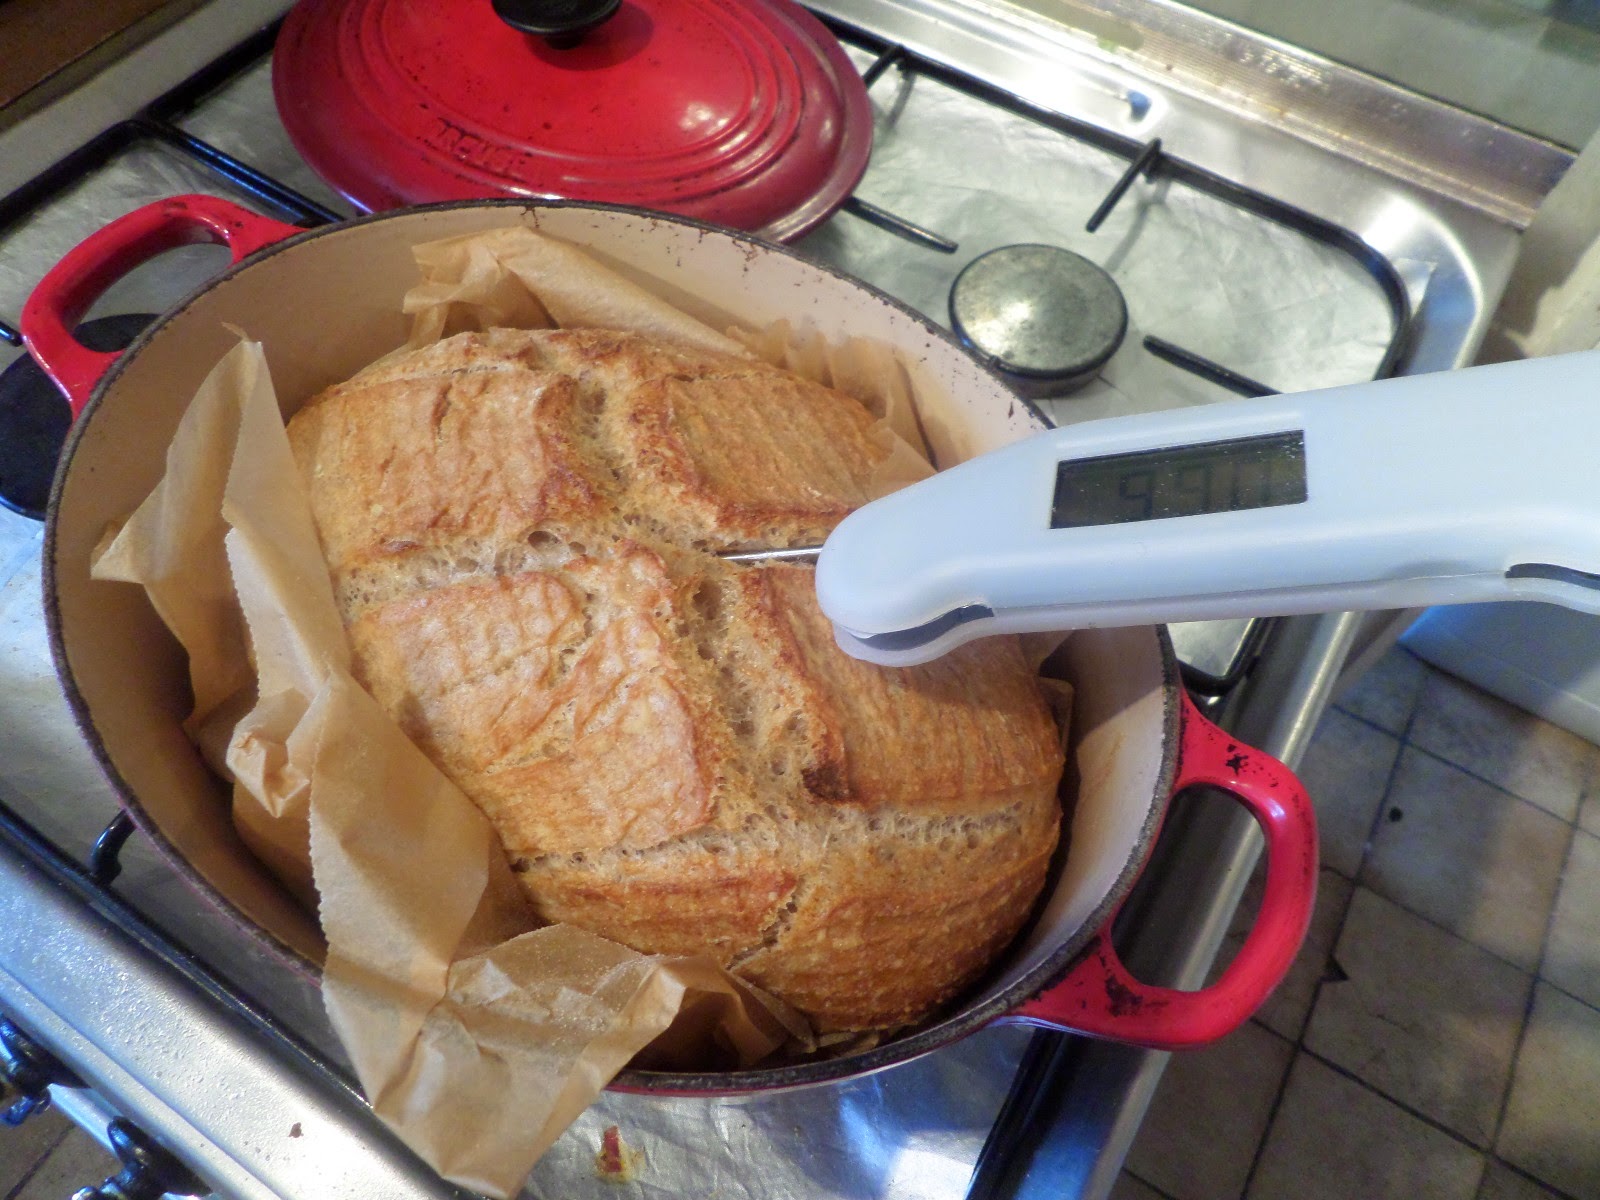
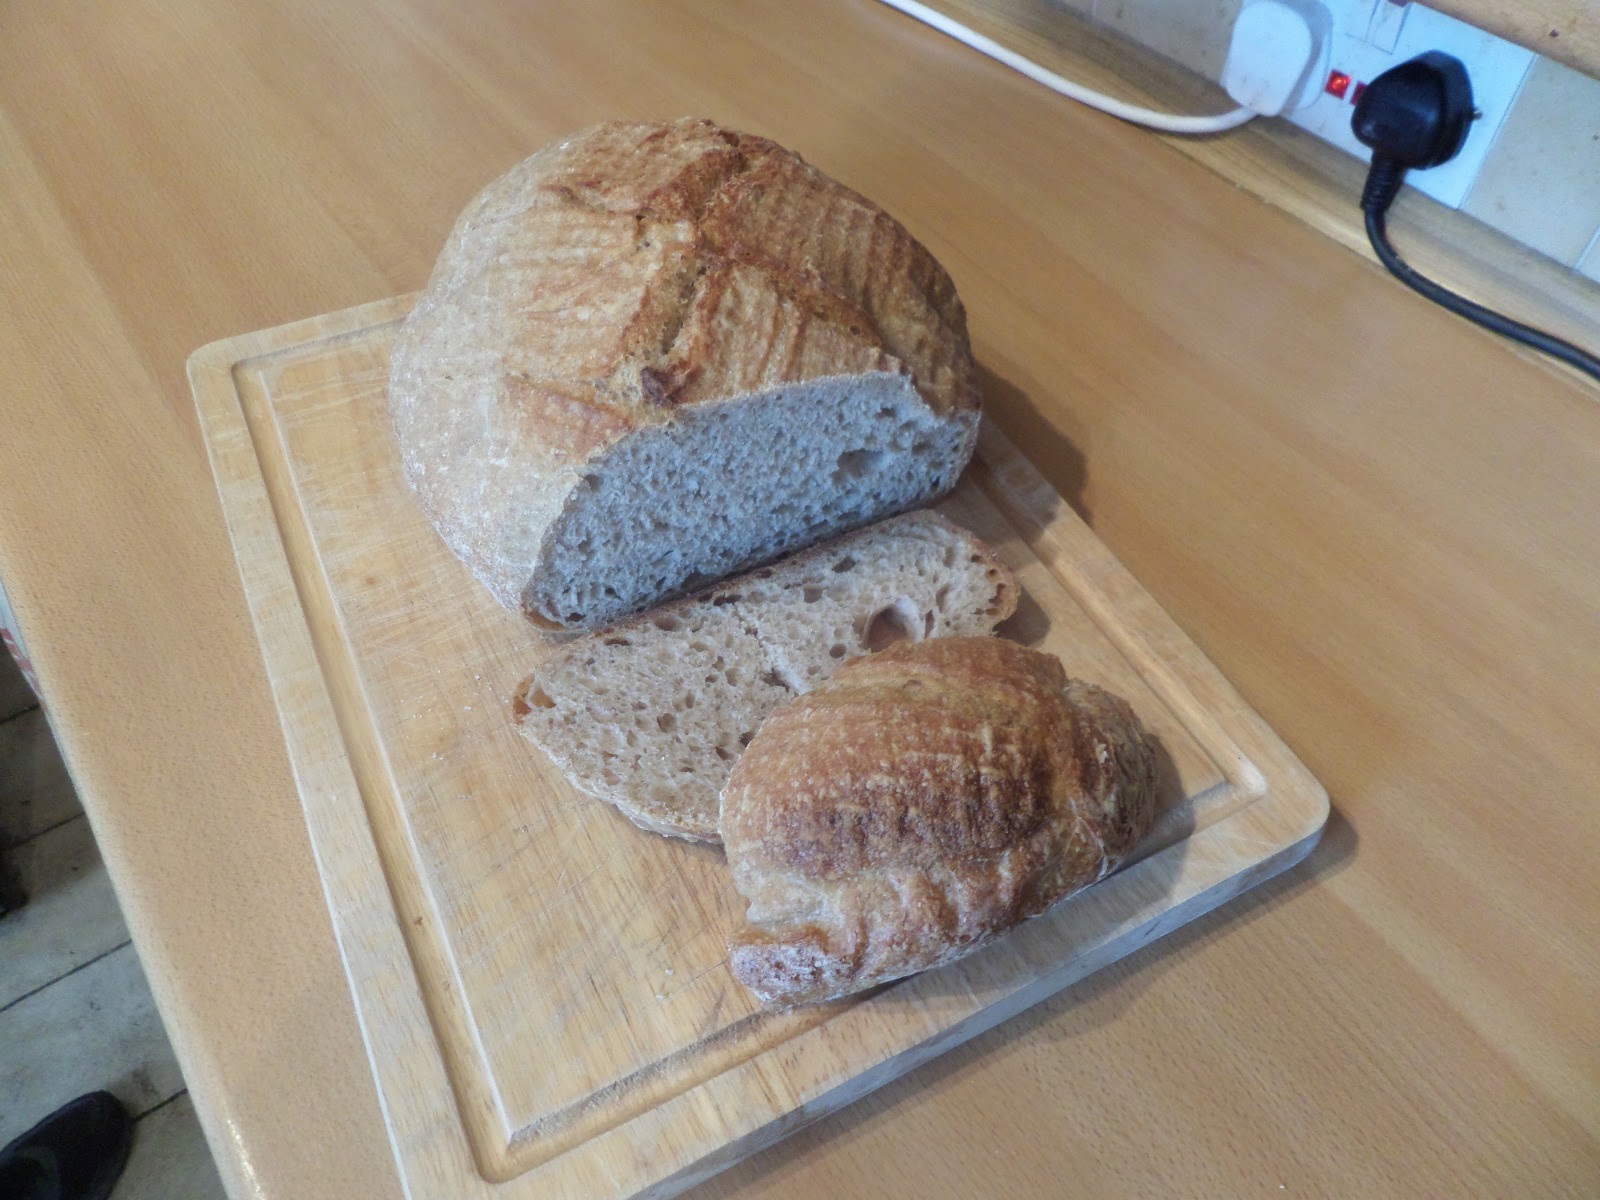
Taking it out is still fiddly: I think I need a longer parchment sling. However once it’s out I realise it’s much higher than previous loaves, which is great!
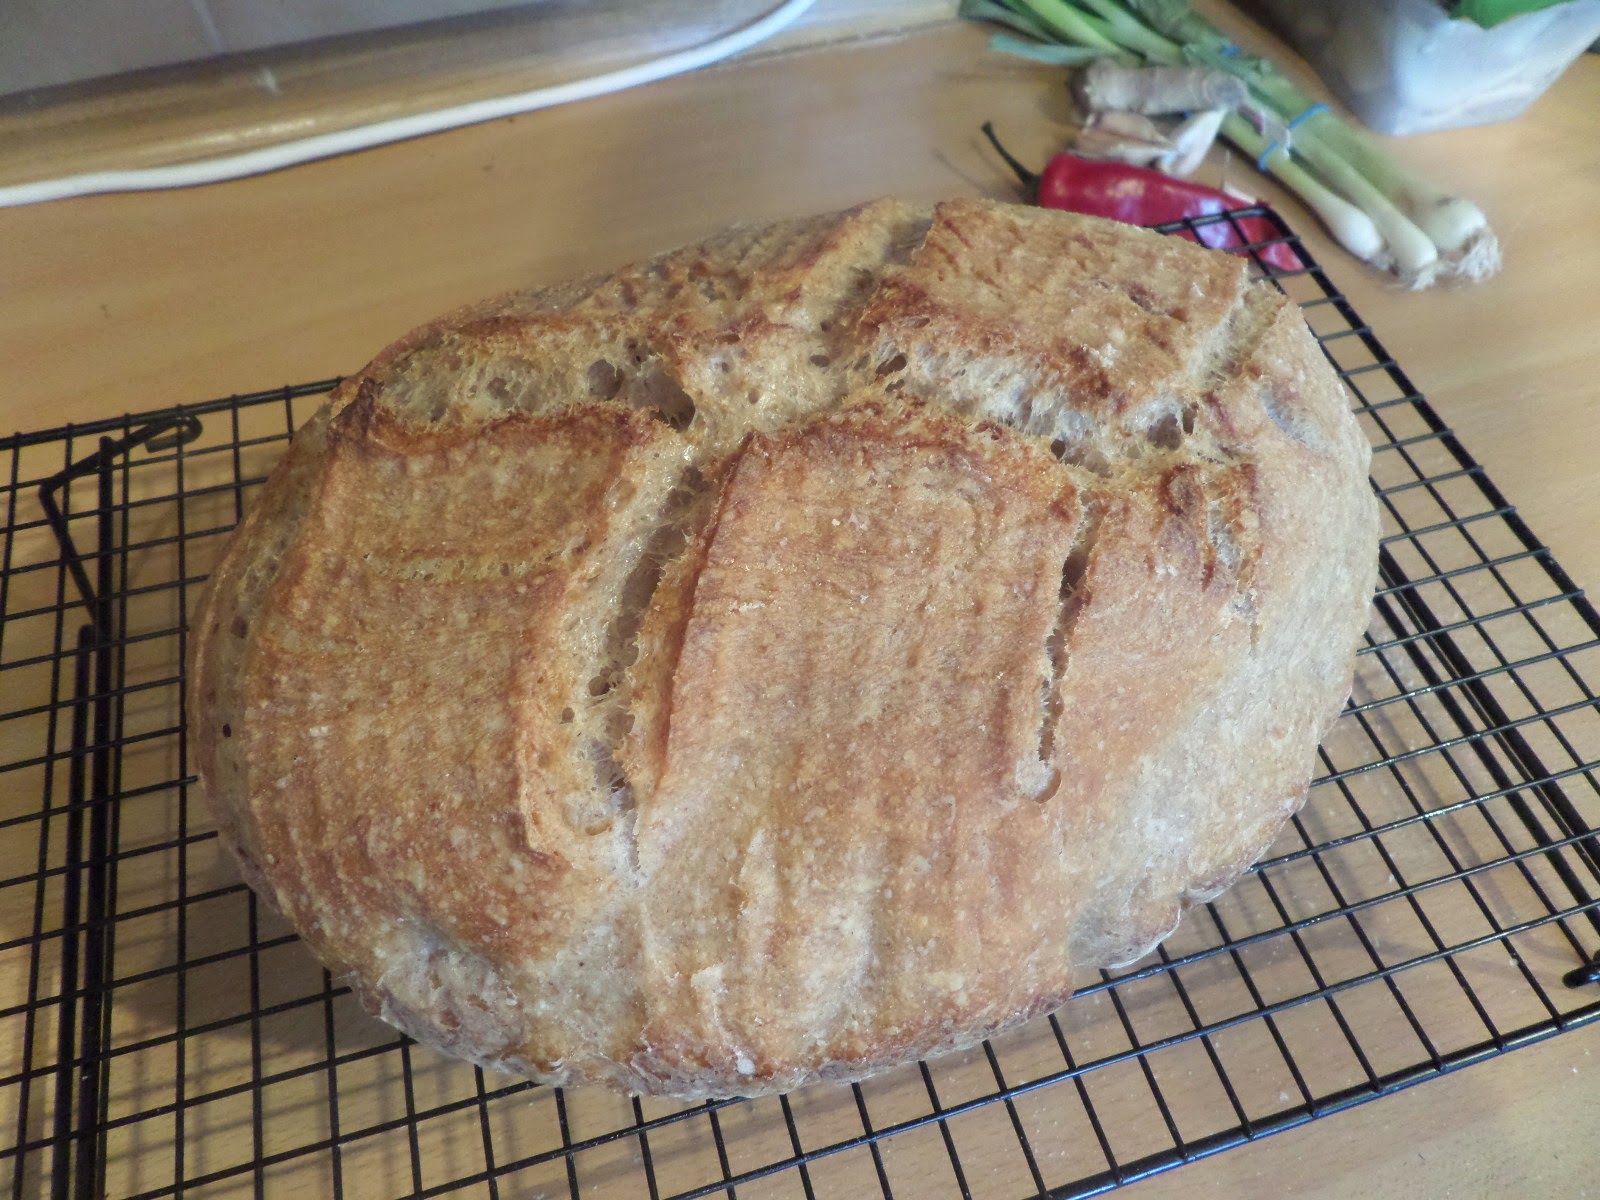
The top crust is great, but the sides could be better, but the casserole only lets the top form the really nice crust.
Slicing into it shows it’s still got a nice open crumb.
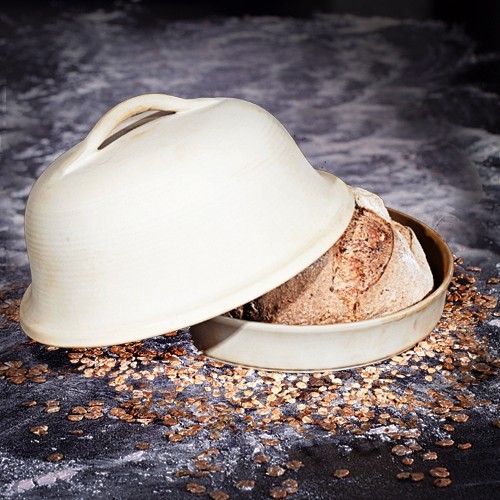
All in all there were lots of improvements. However the transfer to the casserole, and removing it after, were still problematic. So… I’ve found a new toy to hopefully fix that, a bread dome! It’s does the same job of creating a steamy environment, but it’s got much lower sides for easy transfer, and hopefully a better side crust.


You’re making progress with every trial or change. Some time ago, when slicing your dough, pre-cooking, wasn’t totally successful, I was going to suggest using a sharp Stanley knife but now you’ve found the “lame” you’ve got the answer. The new bread dome is a winner too.
LikeLike